
The Rise of Tiny Bonsai
Micro bonsai, miniature trees typically under six inches tall, are gaining popularity. Unlike traditional bonsai that often require significant space, these tiny trees are designed for small living areas. This trend is driven by changing lifestyles and a desire to connect with nature in urban settings.
Micro bonsai are typically styled in pots no larger than 3-4 inches in diameter. This size requires careful species selection and precise techniques. They appeal to apartment dwellers and those with limited space, as they can thrive on a windowsill or desk, unlike traditional bonsai that often need dedicated outdoor areas.
Several factors contribute to the rise of micro bonsai. Increased urbanization leads to smaller living spaces. The pandemic also renewed interest in indoor gardening and mindful hobbies. Social media platforms like Instagram and TikTok have popularized these tiny trees. Bonsai Outlet reports a steady increase in beginner inquiries for smaller, manageable trees, reflecting a blend of lifestyle trends and accessibility.
Suitable Tree Species for Small Spaces
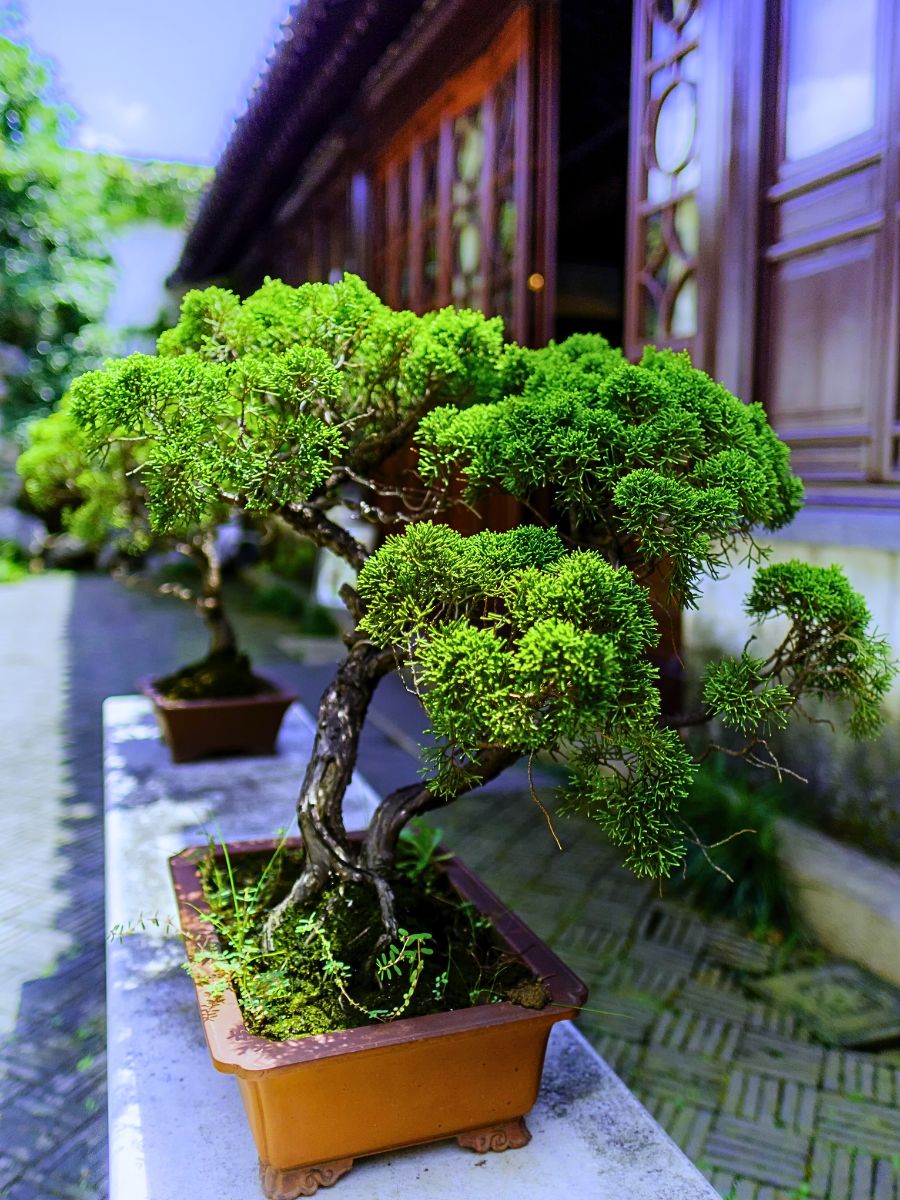
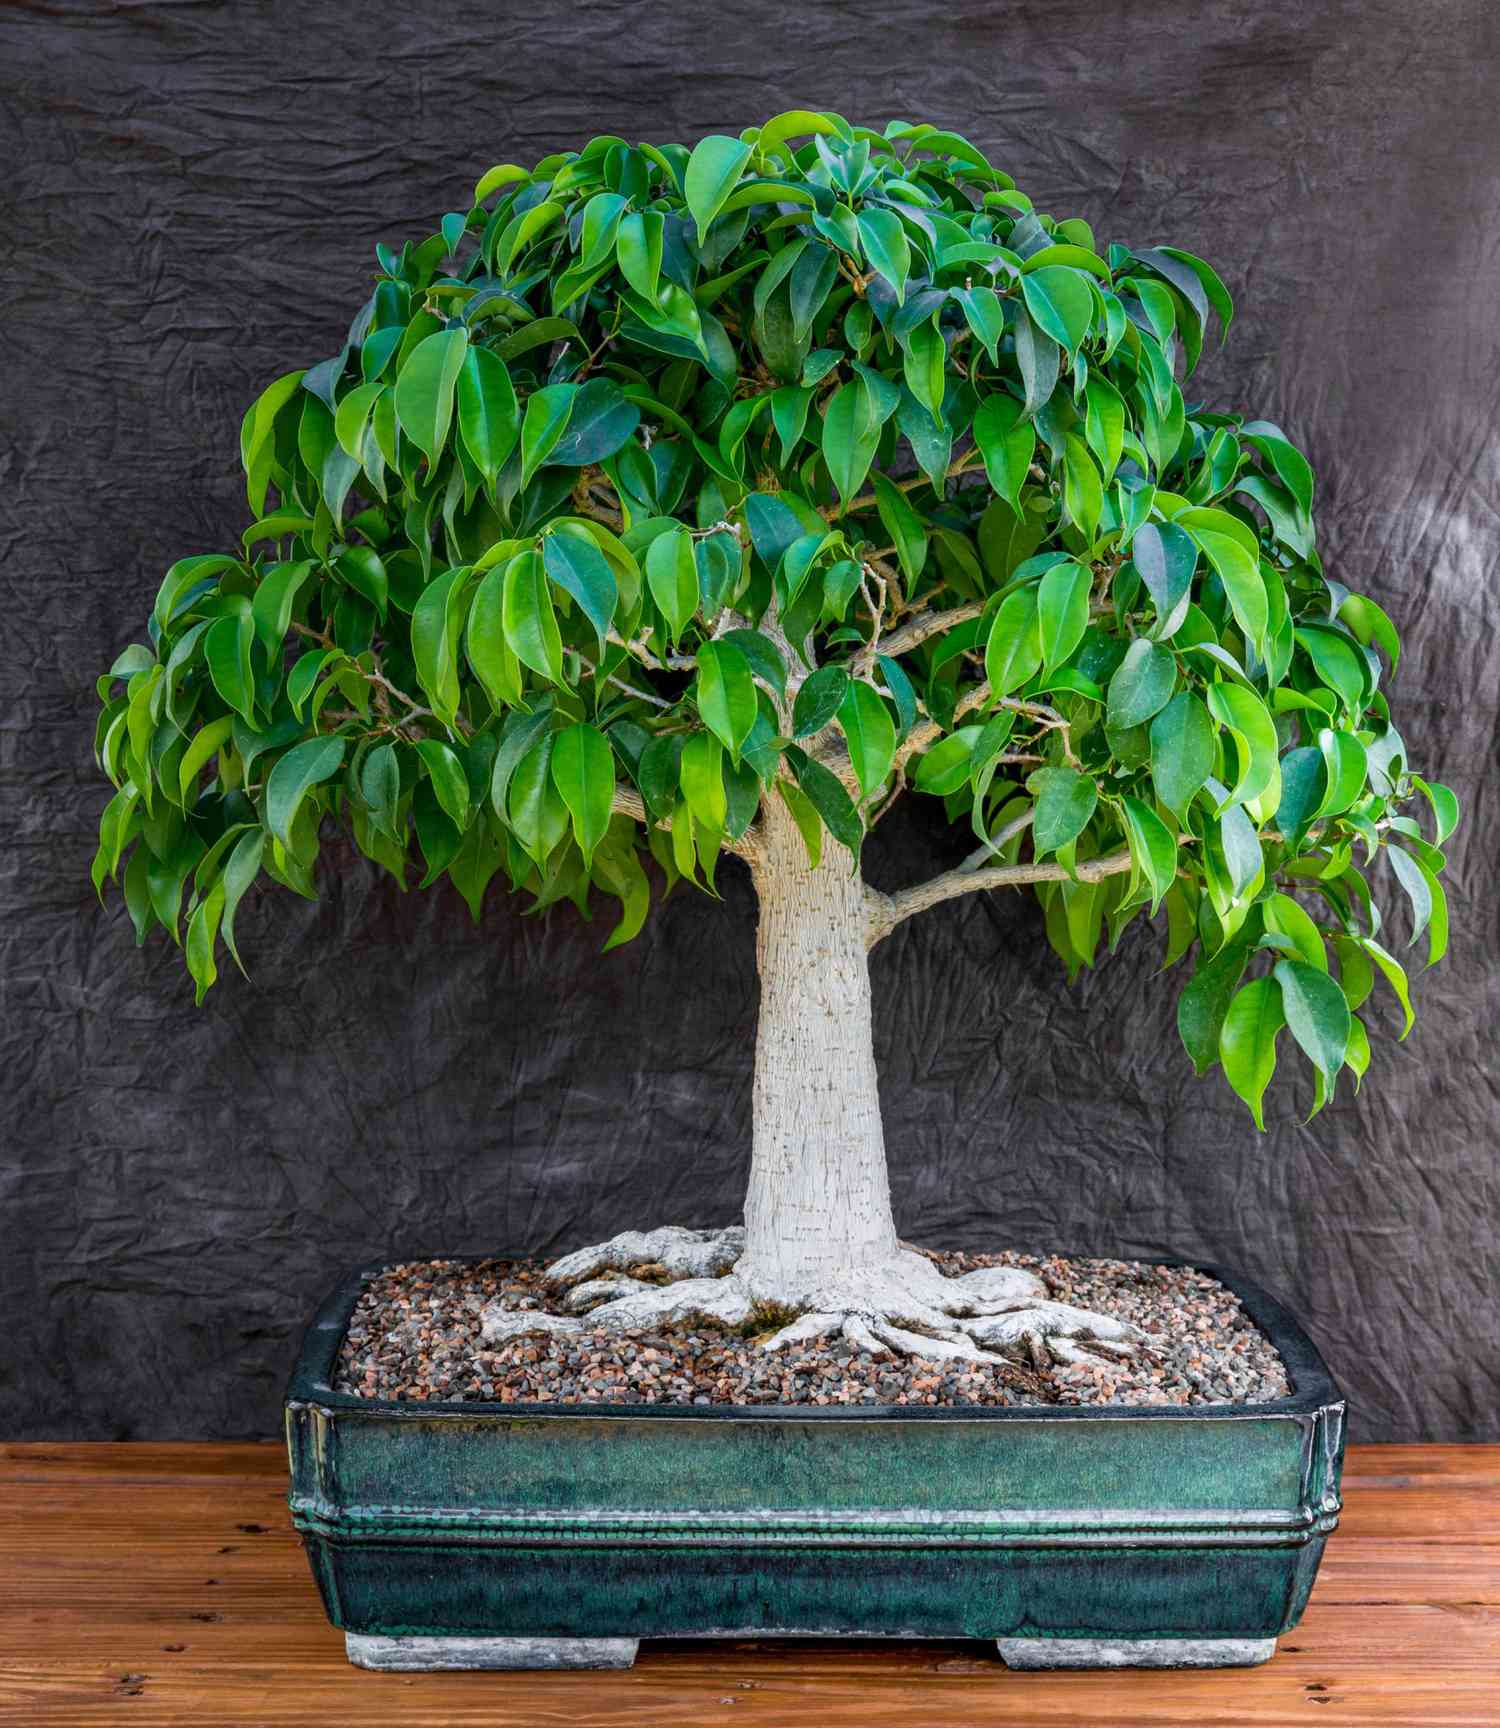
Selecting the right tree species is fundamental for micro bonsai success. Choose trees that naturally stay small, tolerate pruning, and adapt to indoor conditions. The "Green Mound" juniper is a good option for its compact growth and resilience. Ficus retusa and Ficus benjamina are also suitable, offering interesting leaf shapes and relatively fast growth.
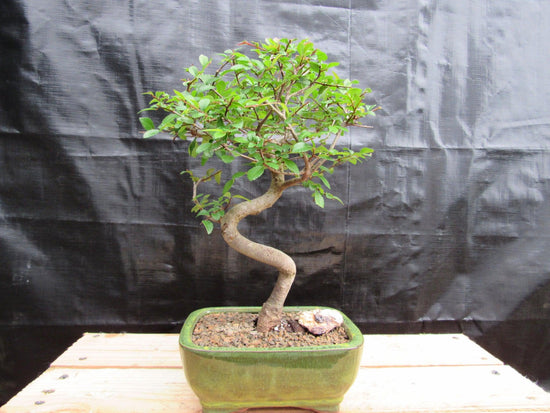
Dwarf schefflera (Schefflera arboricola) and Chinese elm (Ulmus parvifolia) are also good choices, as they respond well to pruning and tolerate indoor life. Serissa foetida (Snowrose) produces small white flowers. Growth rate is important: fast-growing trees need more frequent pruning, while slower ones offer a more relaxed pace. All trees will eventually need repotting.
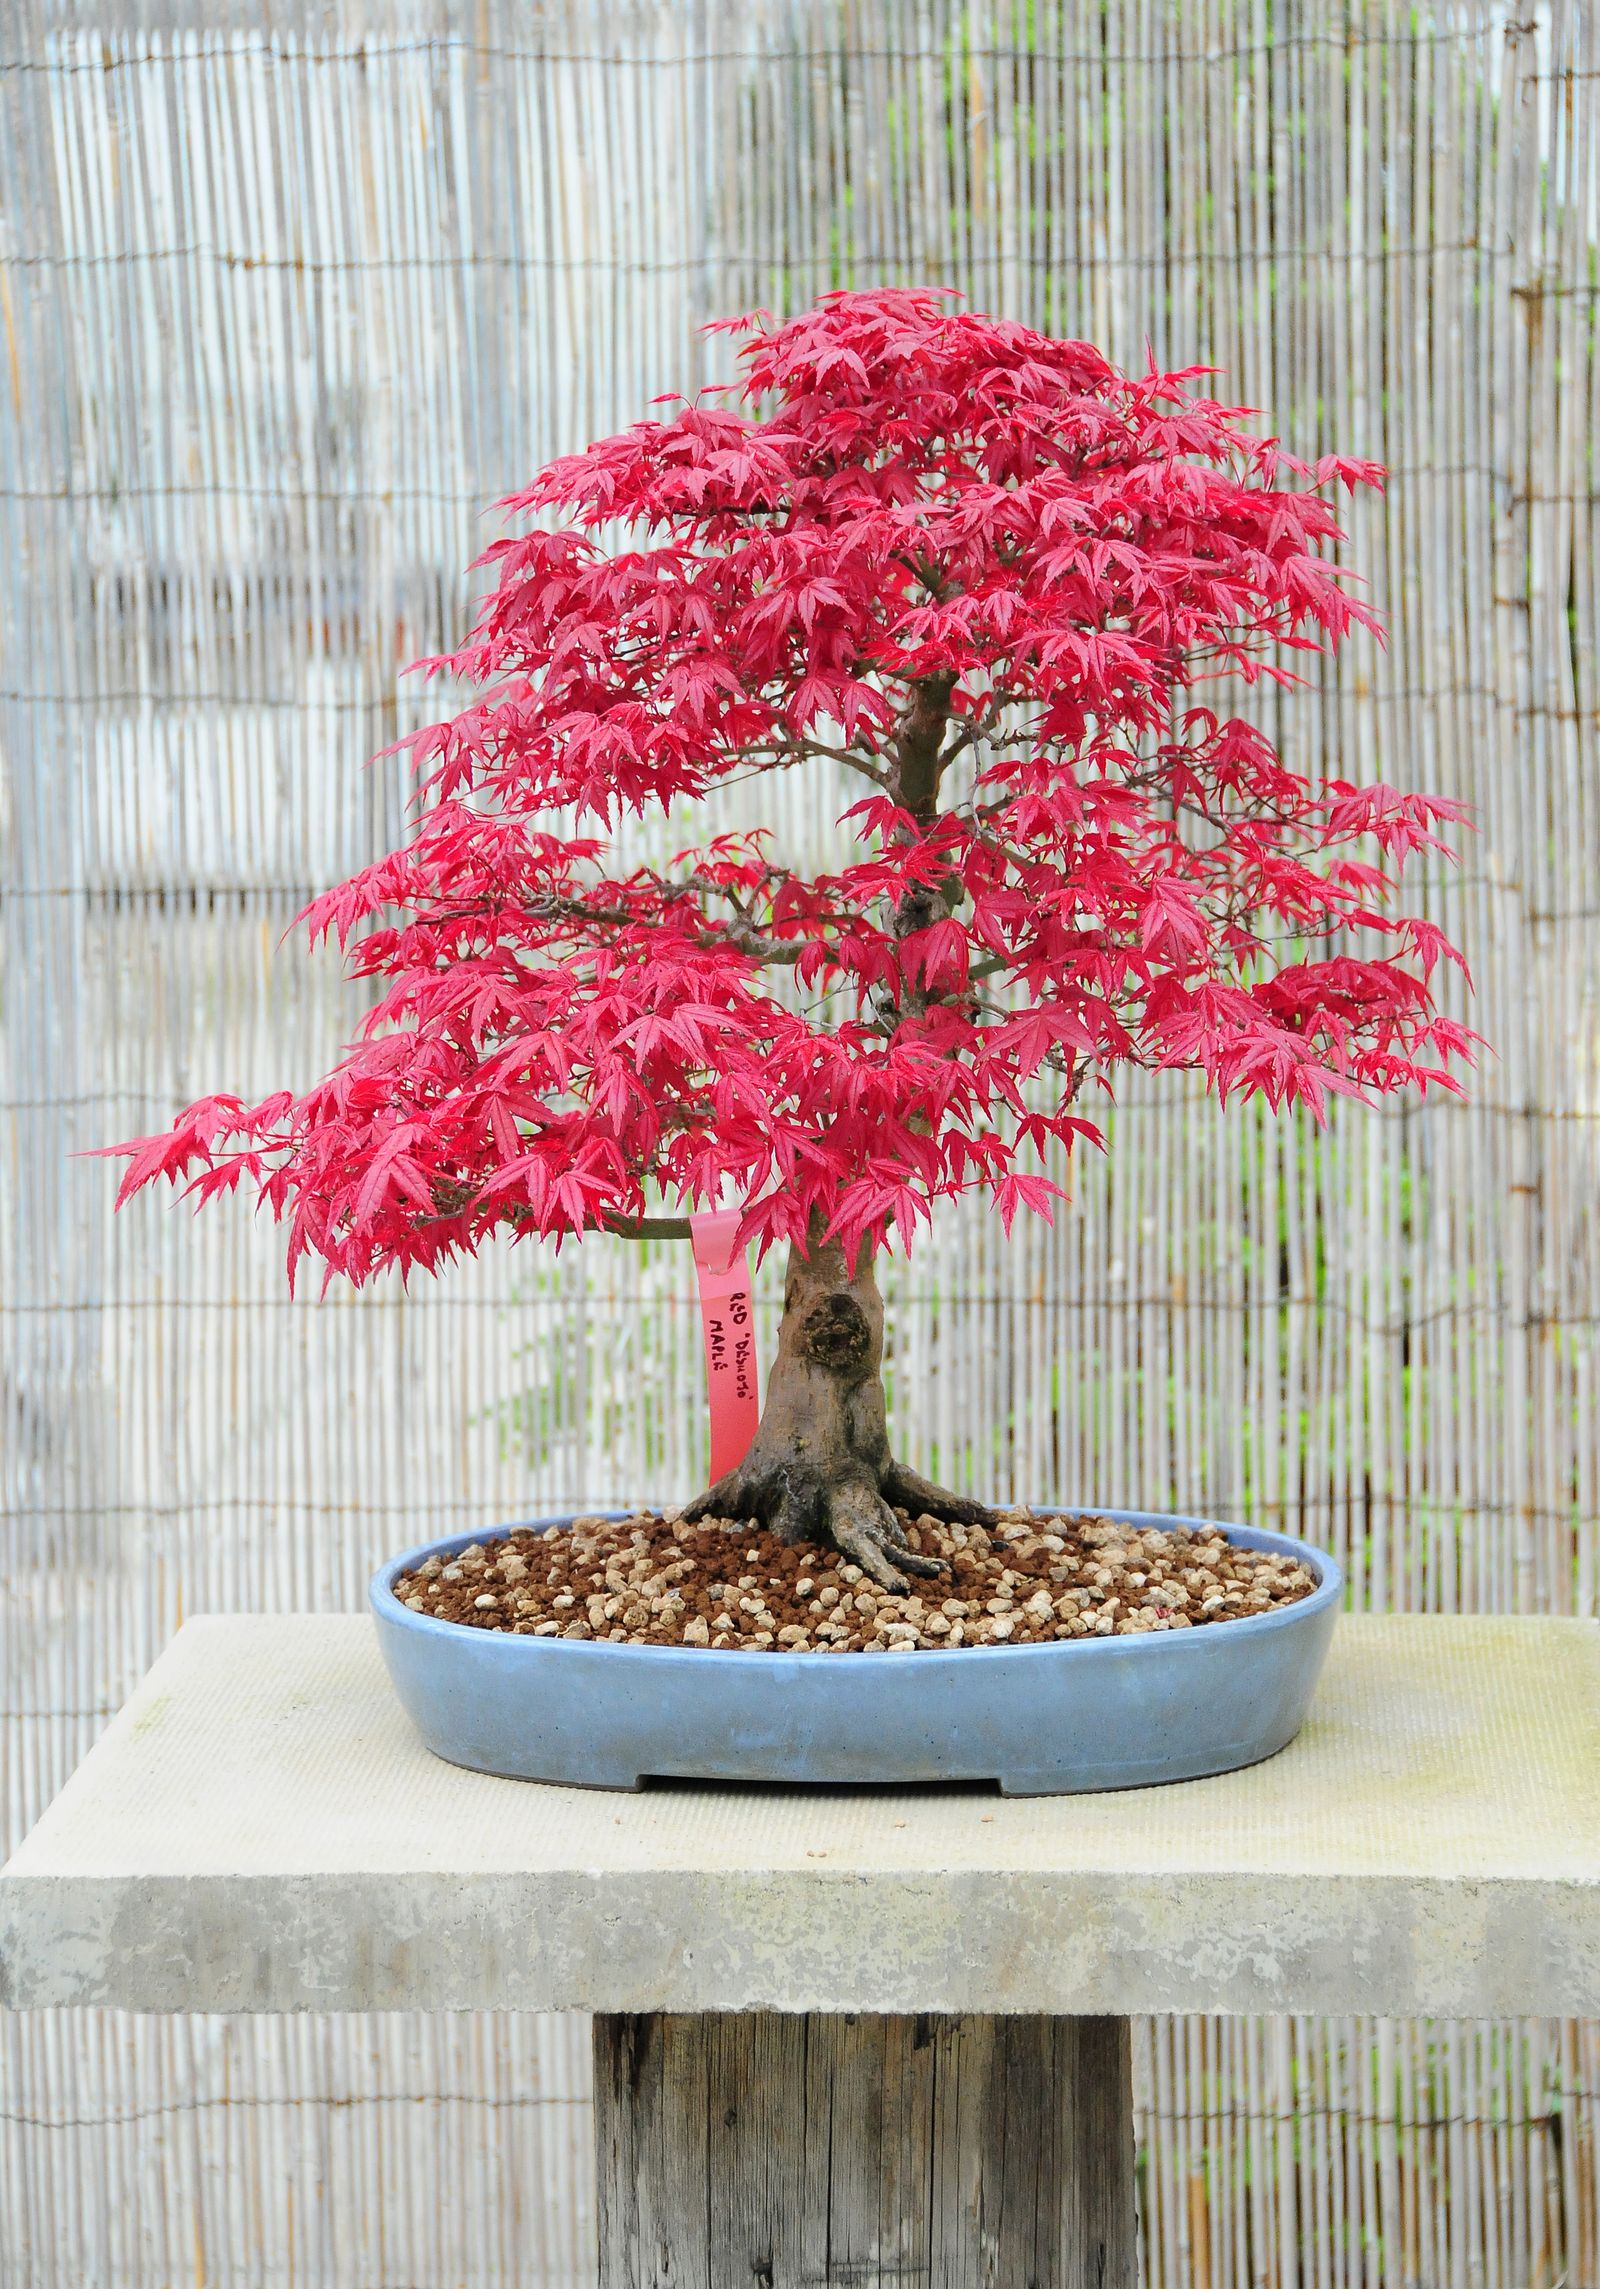
Avoid large-growing trees like maples, pines, and oaks, as they quickly outgrow containers. Trees needing specific outdoor conditions, such as some azaleas or beeches, are also unsuitable for micro bonsai. Forcing a naturally large tree to stay small leads to frustration and an unhealthy plant. Research species carefully before choosing.
Bonsai Empire suggests understanding a species' natural characteristics before training. Beginners should start with hardy, adaptable species. Consider your available light and humidity levels to narrow down choices and increase success.
Are you ready to find your zen? Join us as we explore the ancient Japanese art of cultivating and shaping miniature trees at our "Indoor Bonsai for Beginners" class. Learn more at https://t.co/YzoNPToQO0. pic.twitter.com/cpk3ldkeV5
— Currituck Extension (@CurrituckCES) April 26, 2026
Potting and Soil for Miniature Trees
Pot size is critical for micro bonsai. Oversized pots retain too much moisture, risking root rot. Undersized pots dry out quickly and restrict growth. Aim for a pot that is one-third to one-half the tree's height. Unglazed ceramic pots are preferred for better aeration and moisture evaporation; plastic pots require more careful watering.
Drainage is crucial in small pots due to limited soil volume. Ensure adequate drainage holes and use a well-draining soil mix. A common mix includes akadama, pumice, and lava rock in equal proportions, though ratios vary by species. Horticultural charcoal can improve drainage and absorb impurities.
Different species benefit from different soil mixes. Ficus prefers a richer mix with more organic matter, while junipers thrive in a grittier, faster-draining mix. Maintaining the right soil moisture without overwatering is key. Check soil moisture daily by inserting a finger about an inch deep; water if dry, wait if damp.
Watering and Humidity Control
Micro bonsai dry out quickly in apartment air. Frequent watering is essential, but avoid overwatering. Watering frequency depends on species, pot size, soil mix, and environment. You may need to water daily, or even twice daily in hot weather. Always check soil moisture before watering; do not rely on a schedule.
Use a watering can with a fine rose or a spray bottle to gently saturate the soil without disturbing it. Avoid strong jets of water that can erode soil and damage roots. Ensure water drains freely. Humidity is important, especially in winter when heating dries the air. Micro bonsai benefit from higher humidity.
Increase humidity by placing the bonsai on a pebble-filled humidity tray. Grouping plants together also creates a humid microclimate. A small humidifier can be used, but avoid over-humidifying to prevent fungal diseases.
Pruning and Shaping Techniques
Pruning and shaping micro bonsai present unique challenges due to their small size and slower growth, making mistakes more noticeable and harder to correct. Patience is key. Pinching new growth buds maintains shape and encourages branching. Defoliation, removing leaves, can promote smaller leaf size and denser growth but is an advanced technique requiring caution.
Use very fine wire for shaping branches to avoid damaging delicate bark. Monitor the wire closely, as it can bite into the bark as the tree grows. Micro bonsai can be styled as informal upright, cascade, or semi-cascade. The smaller scale suits intimate, detailed designs. Experiment, but always prioritize the tree's health.
undefined a light touch are key to success. It’s easy to get carried away when pruning, so step back frequently to assess your work.
Lighting and Placement in Apartments
Light is essential for all bonsai, and micro bonsai are no exception. Different species have different light requirements. Junipers and other conifers generally need at least 6 hours of direct sunlight per day. Ficus and Chinese elm can tolerate less direct light, but still require bright, indirect light. The best location in an apartment is a south-facing windowsill, if possible. East- or west-facing windows can also work, but may require supplemental lighting.
If you don’t have access to sufficient natural light, you can use artificial grow lights. LED grow lights are energy-efficient and produce minimal heat. The specific type of grow light you need will depend on the species of bonsai you’re growing. Rotate your bonsai regularly to ensure even growth. This prevents the tree from leaning towards the light source and ensures all sides receive adequate illumination.
Insufficient light will result in weak growth, leggy branches, and pale leaves. If you notice these symptoms, move your bonsai to a brighter location or supplement with grow lights. Be careful not to place your bonsai in direct sunlight for extended periods, especially during the hottest part of the day, as this can scorch the leaves.
Common Problems and Solutions
Micro bonsai are susceptible to the same pests and diseases as larger bonsai, but due to their small size, problems can escalate quickly. Common pests include spider mites, aphids, and scale. Regularly inspect your bonsai for signs of infestation, such as webbing, sticky residue, or discolored leaves. Organic pest control methods, such as insecticidal soap or neem oil, are generally preferred.
Root rot is a common problem, especially in poorly draining soil or with overwatering. Symptoms include yellowing leaves, wilting, and a foul odor. If you suspect root rot, carefully remove the bonsai from its pot and inspect the roots. Remove any rotten roots and repot the tree in fresh, well-draining soil. Leaf drop can be caused by a variety of factors, including stress, improper watering, or pest infestations. Identify the underlying cause and address it accordingly.
Fungal diseases can develop in humid conditions with poor air circulation. Preventative measures include ensuring good air circulation, avoiding overwatering, and removing any dead or diseased leaves. Diagnosing problems early is crucial. Look for changes in leaf color, texture, or shape. Pay attention to the overall health and vigor of the tree. A healthy micro bonsai will have vibrant foliage and strong growth.

No comments yet. Be the first to share your thoughts!